Published On Nov 11, 2017
Use coupon code GUNSNGTRS to save $10 at The Fretwire!
Order this kit here: https://thefretwire.com/shop/category...
Want a Guns and Guitars shirt? buy one here: https://teespring.com/stores/guns-and...
Facebook: / gunsandguitarsofficial
Instagram @gunsandguitarsofficial
Support me on Patreon: / danthompson
*Prices mentioned in this video are subject to change without notice. Please check the links below for current pricing.
Here are the links to the parts I used:
Rockabilly Guitar kit:
http://shrsl.com/13tys
use coupon code GUNSNGTRS to save $10!
Tune-o-matic roller replacement bridge:
https://www.amazon.com/gp/product/B00...
Graphtec TUSQ XL nut piece:
https://www.amazon.com/gp/product/B00...
Full disclosure: I am an Amazon Associate, and the links in this description are affiliate links, which means that if you make a purchase, it doesn't cost you any more money, but I will earn a commission.
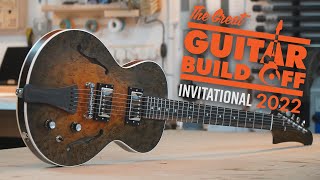
If you’ve ever wanted a gretsch falcon but have been put off by the cost, then watch how I tricked out this kit to play and sound like exactly like a falcon, and I’ll show you a few tips, tricks, and hacks to make it easy and even improve a few things.
Now I know the first thing you guys are gonna say: that thing looks nothing like a falcon! I know. I didn’t want it to. In my opinion, falcons are too blingy and gaudy. I like my guitars to look a little beat up and worn out. But more on that later.
To build this thing I started with this “rockabilly” style guitar kit from the fretwire.com, as of now, they are the only place in the US that you can get this kit. If you watched my review of this kit you know there were a few things that needed fixing, and I’ll show you how I fixed them throughout this project.
I first started out by giving this thing a fret job. Now the frets were supposed to be leveled and crowned from the factory, but it was a poor job. I originally thought I was gonna have to completely relevel them and start over, but when I took a closer look I realized that it was only off in a few places, so I decided to just give it what I call a “fret touchup”. To do this, I use a credit card as a fret rocker to find out which frets where taller than the rest, and marked them with a sharpie. Notice that some of the frets were only partially marked, that’s because the fret was level at one point, but not level at another point. After they were marked, I taped off around those frets to protect the fretboard, then used a nail file and a triangle file to shave off a little bit of the frets where they were too high, stopping to check frequently with my rocker to make sure I didn’t take too much off. Once they are all level, it’s important to check all the frets again with the rocker, since filing down some frets could reveal other high spots. Keep repeating this until all your frets are level with the rocker. Once they were all level, I continued like I would with a standard fret job, and crowned and polished each fret that I had just filed.
...read more on my blog at http://gunsandguitars.net
Full disclosure: Links in this description may be affiliate links