Published On Oct 27, 2021
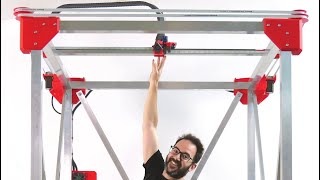
In this video, we’re going to be making some upgrades to my previously built IoT weather station using suggestions from the comments section. We’ll see how well the weather station performs after the upgrades and I’ve included a link to the public Thingspeak channel below, so you can have a look at the most recently recorded data.
ADDITIONAL INFORMATION
---------------------------------------------------
Visit my blog for the full upgrade instructions, code and 3D print files - https://www.the-diy-life.com/i-upgrad...
View the weather station's dashboard - https://www.the-diy-life.com/3d-print...
Original weather station video - • DIY 3D Printed IoT Weather Station Us...
PURCHASE LINKS
---------------------------------------------------
What You Need For This Upgrade Project
Firebeetle ESP32-E IoT Development Board – https://bit.ly/2VYygmj
BME280 Sensor – https://amzn.to/3jzTaB3
Allegro A3213 Hall Effect Sensor (Link is for A3144, Amazon don’t have A3213) – https://amzn.to/3GhG0m0
3000mAh LiPo Battery – https://amzn.to/3npdTbJ
5V 1A Solar Panel (Similar Specs) – https://amzn.to/3m9unW4
Solar Power Management Board - https://amzn.to/3Gm1Wwm
Ribbon Cable – https://amzn.to/3B50gmU
Header Pins – https://amzn.to/3maeMpp
Button Head Screws - https://amzn.to/3b8UJRU
Tools & Equipment Used
Creality Ender 3 V2 3D Printer – https://amzn.to/3GgON7E
TS100 OLED Soldering Iron - https://amzn.to/3b6iaLp
Dremel Versatip Soldering Iron - https://amzn.to/3vHHKzK
Fluke Multimeter - https://amzn.to/3snFyvY
Some of the above parts are affiliate links. By purchasing products through the above links, you’ll be supporting this channel, with no additional cost to you.
CHAPTERS
---------------------------------------------------
0:00 Intro
0:31 Which Components Will Be Upgraded
1:28 Replacing The Components
3:17 Software Changes
4:37 Testing The Power Consumption
5:49 Re-assembly
6:21 Adding Solar Charging
8:02 Conclusion
If you've got any ideas for Raspberry Pi, Arduino, or other Electronics projects or tutorials you'd like to see, let me know in the comments section.