Published On Jan 28, 2022
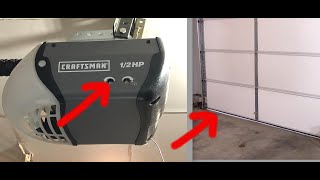
Craftsman Garage Door Opens but Won't Close - Garage Door Not Closing Fix Replace Main Circuit Board
Craftsman Garage Circuit Board: https://amzn.to/3HyedgV
Craftsman Garage Remote Control: https://amzn.to/3ENfBu7
Craftsman Garage Keypad: https://amzn.to/31lsf64
I recently ran into a problem with my Craftsman garage door opener where it opens like normal when I use the remote. But for some reason it won't close. Eventually I identified the issue and my problem was fixed with a new circuit board. In this video, I'll show you how to remove and replace the circuit board.
First, unplug the motor. But before doing anything else, take a picture of the wiring and control settings for later reference. Ok now take out the light bulb and unscrew the wire terminals to loosen them up. Then take out the 4 screws holding the control panel to the motor housing.
Gently pull the wire connector from one side then the other until it slips off. All I have to do is swap the circuit boards and the problem is solved. First I'll remove the 5 screws that hold the circuit board onto the original faceplate. This is really easy to do and all you need is a Philips screwdriver. Then take note of the wire colors and then unplug the spade connectors on the light socket. Doing this completely detaches the board from the faceplate.
Now I'll just repeat the same process on the replacement part. All I really need is the circuit board. After the screws are out, I'll have to disconnect the remaining 2 wires. Now it's time to put the new circuit board into the old faceplate.
At this point, I can just go ahead and reverse the entire process. Take the 5 screws from earlier and use them to secure the board in place. I hope you're able to see how easy this repair is. Now compare the blue adjustment dials and set the new board exactly the same as was on the old board. After this, the assembly is complete!
Reattaching the faceplate to the motor housing is easy. As far as the screws go, the shorter ones go up on top and the longer ones go on the bottom. And please watch the entire video because towards the end I'll show you how to reprogram the wireless remote and keypad.
When the faceplate is secured, refer to the picture you took earlier to help reconnect everything to the terminals exactly like before. Last thing to do is screw in the light bulb and plug the garage door opener back in.
Because this is a new circuit board the wireless remote needs to be reprogrammed. Here's how to do it. Locate and press the sync button once on the motor housing. With the LED lit up, press and hold one of the buttons on the remote until the light bulb blinks once. That means programming was successful. And now my wireless remote will be able to open and close the garage door.
Now let's get the keypad programmed. Start by pressing the sync button on the garage door opener. Now type in a 4 digit PIN number and press and hold the Enter button. The garage door opener will blink once. Then press the Enter button on the keypad again and then the door will operate like normal.
And even though the remotes now work, you'll also have to reprogram the garage buttons in your car in order to sync them. I have video tutorials for my cars but you'll need to consult your owner's manual for the vehicles you own. If this video was helpful please give me a thumbs up and hit the subscribe button to stay up to date on all my weekly videos!
Disclaimer: As an Amazon Associate I earn from qualifying purchases.
***Equipment I Use For My Videos***
Canon EOS M6: https://amzn.to/2pwQ0Vq
Canon EF-M 22mm f/2 Lens: https://amzn.to/31mLfLq
Tokina 11-16mm Wide Angle Lens: https://amzn.to/33TFaYH
Fotodiox EF to EOS M Lens Adapter: https://amzn.to/31u3AGq
Comica CVM-WM300A Wireless Microphones: https://amzn.to/31tbiAD
Aputure Amaran AL528W LED Light: https://amzn.to/2VRuwyK
Kamerar SD-1 Camera Slider: https://amzn.to/2VUB5Ax
AVermedia HDMI Game Capture Module: https://amzn.to/31phsSp