Published On Sep 22, 2024
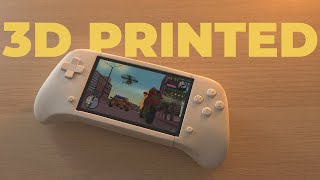
I present to you a full video on how to build a DIY handheld gaming console. This first part will show you how to build the game handheld (hardware). The next part (software) will release on next week, I hope 😉. I call it version 2 because it's improve: main board, faster boot, more battery and fixed a few issues compare to the first version (short video).
The part 2 is ready. Please see this link: • [Fun & Share] DIY Handheld Gaming Con...
Details:
- Main board: Raspberry Pi Zero 2 w.
- Screen: 3.5 inch 640x480 (I used the old screen from last build. It's because the new screen is bad quality😅).
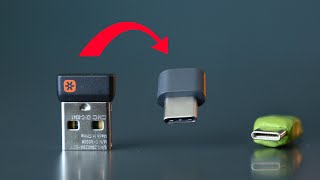
- Charger board: support USB type C (input) and show the battery status with 4 leds.
- The new case support custom battery.
- Battery: 4000 mah.
Timestamps:
0:20 [Case] Drill 4 extra buttons
4:56 [Case] Make the hole bigger with sand paper
11:30 [Case] Modify for the screen
18:17 [Soldering] The controller board
32:24 [Soldering] The power cables
34:27 [Soldering] Power cable (screen) to Raspberry Pi
36:02 [Screen] Put the screen and driver board together
38:51 [Screen] Stick the screen to the case
41:18 [Power switch] Make the holder
49:00 [Soldering] Power switch and charger board
56:07 [Soldering] Battery
59:20 [Soldering] Sound board
1:10:18 [Case] Modify for the input charge port
1:15:41 Put all together
1:19:05 Add the screen protect
Parts to build:
- 1 x Screen and controller board: https://www.aliexpress.com/item/10050... (The product is great, I used it for the version 1)
- 1x GameBoy case: https://aliexpress.com/item/100500216... (*) (The screws are not correct for controller board and battery 🥲)
- 1x Screen protector: https://aliexpress.com/item/400053846...
- 1x Power Switch: https://aliexpress.com/item/400069932... (*)
- 1x Mini HDMI board And cable (10cm): https://vi.aliexpress.com/item/100500... (*)
- 1 x Controller board: https://aliexpress.com/item/100500446... (*)
- 1 x Sound board: https://aliexpress.com/item/100500629...
- 1 x Charger board: https://aliexpress.com/item/100500600... (*)
- 1 x Battery: https://aliexpress.com/item/100500596... (*)
- 2 x Micro USB male header: https://aliexpress.com/item/100500633... (*) This version has 2 wires, So you don't have to solder.
- 1 x USB type C male header: https://aliexpress.com/item/100500649... (*)
- 1 x USB type C female header: https://aliexpress.com/item/100500697... (*)
(*) mean "Not sure about the quality, I bought from a different market"
Notice:
- You should buy a see through case. It's because you can see the battery status on top.
- The screen border should be 2mm If you want to use a glass protector.
- I don't know which market place is good for you to buy the parts. So I used the link from Aliexpress.
- Oops, I forgot to include the soldering mapping (GPIO) in the video 😅. You can find it here: https://drive.google.com/file/d/100bR...
- Don't screw the screws too tight on the control board (I only use 2 screws on top) and battery place. It will make the buttons a bit difficult to press.
Hope you guys like this video.
Please do not re-upload or clone my video. Just do it by yourself 😁
Best regards.