Published On Oct 11, 2024
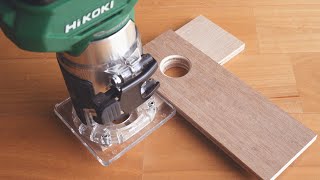
With this jig, you can easily and safely process mortise holes with just one trimmer.
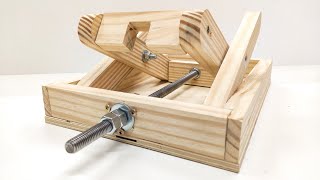
By using it in combination with the tenon processing jig, you can easily create very high-precision, high-strength joints.
I will post the drawings to the community, so please use them as a reference and try making your own.
PLAN ↓
Tenon processing jig ↓
• トリマーを使って簡単にホゾ加工できる治具
Short videos are updated every day!
If you like this video, please give it a thumbs up and subscribe to the channel.
I would also be happy if you would sign up for a membership!
0:00 Make a long hole using the trimmer table (11mm)
0:52 Make a long hole using the trimmer guide (6mm)
1:34 Replace the trimmer bit (6mm→11mm)
2:21 Check the depth of the groove
2:35 Make a long hole in the stopper (6mm)
3:18 Drill a hole for the claw nut (7mm M5) (knob bolt 20mm M5)
4:05 Drill a hole for the insert nut (φ8mm M5)
4:30 Instant adhesive, activator Temporarily secure with screws, and assemble with screws while keeping in mind the right angles (35mm screws)
5:15 Assembly (20mm pan head screws, M5, 16mm diameter washer)
5:56 Make a centering jig using a tenon processing tool
6:54 Try machining 1
7:12 It's useful to make a positioning jig like this
7:30 Attach a template guide bush to the trimmer (included with the trimmer)
Attach a hose band (hose clamp) to make a depth stopper
8:52 Try machining 2
#woodworking #diy #woodwork