Published On Apr 16, 2020
How to create a wicking bed
There are many reasons for creating a wicking bed instead of your conventional garden bed. Less water wastage, don't need to water the beds anywhere near as often, can be built over any surface and best part is that they can be relocated (with a bit of effort).
So whether it be that you don't have as much time to be watering gardens or maybe you're renting an apartment and want to grow some food on your balcony. These wicking beds are awesome and this video will give you a run down on how to build one.
What you'll need:
Garden Bed
You can use just about anything for this. Timber works well and easier to drill holes in for the drainage overflow. When selecting your garden bed, keep in mind that you need at most 250-300mm (9.8-11.8in) depth of soil as this is the upper limit of the soils ability to wick up water. The minimum depth of reservoir is preferably 150mm (5.9in). So at a minimum you'll need a bed that is min 400mm (15.7in) tall.
Soil
Some high organic material soil is preferred, but work with what you can get. The amount needed will depend on your garden bed size. Calculate it by Length x Width x 0.3 = Xm3 (for example a bed size of 1m x 2m, the quantity of soil required is 0.6m3)
Aggregate or Scoria
This is the reservoir material. The amount needed will depend on your garden bed depth. To work it out, you need to work out your soil depth and take that from the depth of your garden bed. For example in this video the bed I used was 400mm tall, I used 250mm depth of soil leaving me with 150mm of reservoir. Total aggregate I needed was 1m x 2m x 0.15 = 0.3m3 of aggregate.
Geotextile fabric or Shade cloth
This is to go in between the reservoir and soil layers. If using shade cloth, make it 2 layers to ensure very minimal soil particles get into thereservoir layer.
50mm Slotted Ag Pipe (Sub-soil drainage pipe)
This pipe is to allow the water to seep into the reservoir. This pipe is to sit in the middle of your reservoir material (aggregate/scoria) and length required is calculated on the garden bed size to evenly distribute water.
50mm PVC Pipe (reservoir inspection/filling point)
This is the pipe that shows out the top of the garden bed. It is the filling point for the reservoir and you can also use it to inspect the depth of water currently still in the reservoir.
50mm PVC End Cap
This item is required for covering the top of the reservoir inspection/filling point to stop mosquitoes from entering and becoming a plague in your garden.
50mm PVC 90 degree Elbow
Goes onto the end of the 50mm pvc pipe in the bed. the 50mm ag pipe connects to this one.
20mm PVC pipe
We're using this pipe to create the drainage overflow
20mm PVC 90 degree Elbow
this is to create a bend to place our 20mm pvc riser for drainage overflow.
Heavy Duty Builders plastic
Get the thickest and most heavy duty plastic you can get a hold of. Skimp out here and you may get a hole in it and then losing all your hard work. This is to line the whole garden bed bottom and sides.
Method:
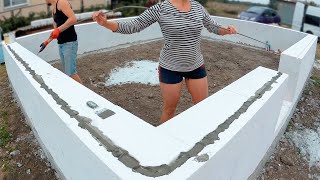
1. Have the garden bed assembled and placed where you'd like to grow your food (preferable in full sun or shaded from the harsh afternoon sun).
2. Drill a 20mm hole near the bottom of the garden bed on one side. This is your drainage overflow hole. Test fit the 20mm PVC pipe to ensure it is snug.
3. Line garden bed with Builders Plastic.
4. Place a small X cut in the plastic where the drainage overflow hole is and squeeze the 20mm pipe through so it is a tight and snug fit (video shows it well)
5. Add your riser (more 20mm pvc pipe) to the 20mm pvc 90 degree bend coming out the side of the bed from the drainage overflow pipe. This riser length need to come up to the reservoir height. The idea is that you can see the water level in the reservoir in the riser. If it gets too full, the water will bubble over the top and drain away.
5. Fill bottom of garden bed with 50mm of aggregate/scoria (this should cover your overflow drainage pipe).
6. Clamp the 50mm PCV pipe with 90 degree Elbow attached to ag pipe to side of garden bed and roughly place the ag pipe to give an even water distribution (time lapse on video demonstrates this). It can be held in place by putting some extra aggregate/scoria over the pipe at bends.
7. Cover the ag pipe with remaining aggregate/scoria to the required depth of your reservoir and ensure that it is level.
8. Place your geotextile fabric or shade cloth on top of aggregate/scoria reservoir layer.
9. Time to shovel in the soil. Fill up the remaining of the garden bed, but leave 25mm (1in) from the top for mulch.
10. Trim the excess plastic from the top of the garden bed (you don't have to, but it looks much neater if you do).
11. Place your mulch material and water in and fill up reservoir.
12. PLANT SOME FOOD!
I hope you enjoyed the video and if there are any questions, feel free to comment.
I appreciate all the support by liking, thumbs up and subscribing to my channel.